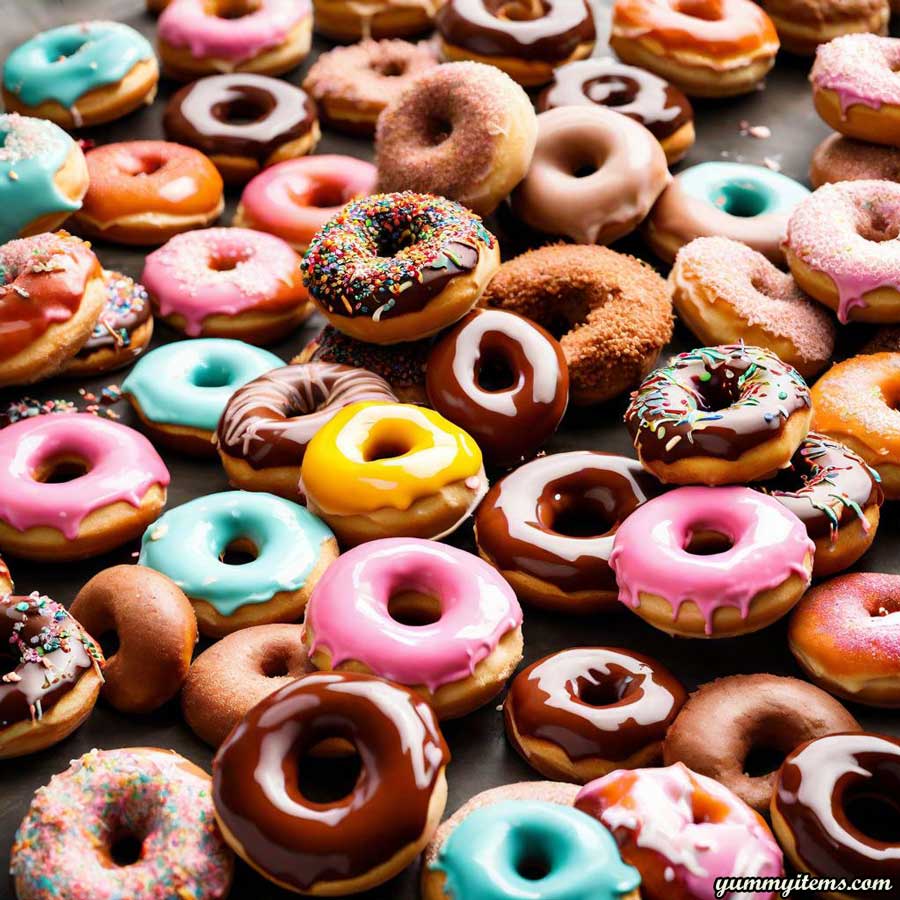
Donuts, those delectable rings of fried or baked dough, are a favorite treat for people of all ages. One of the essential elements that elevates the humble donut to a scrumptious delight is the glaze. A perfect glaze can make your donuts irresistible, providing that glossy finish and a burst of flavor. In this comprehensive guide, we will explore the art of making glazes for donuts. Whether you want your glaze to harden beautifully, need a recipe using powdered sugar, a rich chocolate glaze, or an alternative without powdered sugar, we’ve got you covered. We’ll also delve into donut glazes, toppings, white donut icing, and even touch on the basics of making donuts themselves. So, grab your apron and let’s start glazing!
Table of Contents:
- Chapter 1: How to Make Donuts – The Foundation
- Understanding the basics of donut making
- Ingredients and equipment you’ll need
- Different types of donuts
- Chapter 2: The Science of Donut Glazes
- Why the glaze is crucial
- The different types of donut glazes
- Factors that affect glaze texture and flavor
- Chapter 3: How to Get Donut Glaze to Harden
- Achieving that perfect, glossy finish
- Key tips for a hardening glaze
- Troubleshooting common issues
- Chapter 4: How to Make Glaze for Donuts with Powdered Sugar
- The classic powdered sugar glaze
- Step-by-step recipe
- Variations and flavorings
- Chapter 5: How to Make Chocolate Glaze for Donuts
- The indulgence of chocolate-glazed donuts
- A simple chocolate glaze recipe
- Creating variations like chocolate ganache
- Chapter 6: Donut Glaze Recipe with Water
- A water-based glaze alternative
- The role of water in glaze
- Step-by-step recipe for a water-based glaze
- Chapter 7: How to Make Glaze for Donuts without Powdered Sugar
- Glazing without the classic ingredient
- Alternative sweeteners and thickeners
- Recipes and recommendations
- Chapter 8: Donut Glazes and Toppings
- Exploring the world of creative donut toppings
- Glaze and topping combinations
- Unique and unconventional ideas
- Chapter 9: White Donut Icing Recipe
- A spotlight on the elegant white donut icing
- Recipe and techniques for a pristine finish
- Using white icing as a base for decorations
- Chapter 10: Donut Decoration and Presentation
- Enhancing the visual appeal of your donuts
- Presentation tips for professionals
- Creating a signature look
Chapter 1: How to Make Donuts – The Foundation
Before we dive into the wonderful world of glazing, it’s crucial to understand the basics of making donuts. The texture, flavor, and shape of your donuts will greatly influence how well they take to the glaze. We’ll walk you through the ingredients, equipment, and various types of donuts you can make. So, if you’re ready, let’s start with the foundation.
Understanding the Basics of Donut Making
The journey to perfecting donut glazing begins with the dough. There are two primary types of donuts: yeast-raised and cake donuts.
Yeast-Raised Donuts: These are light, airy, and have a slightly chewy texture. They require proofing the dough and are often used for classic donut shapes.
Cake Donuts: Cake donuts, on the other hand, are denser, crumbly, and less fluffy. They don’t require yeast and are quick to make, typically using a batter instead of a dough.
Ingredients and Equipment You’ll Need
For yeast-raised donuts, you’ll need ingredients like all-purpose flour, yeast, sugar, salt, milk, eggs, and butter. Cake donuts rely on ingredients like flour, sugar, baking powder, salt, milk, eggs, and often include flavorings like vanilla or nutmeg.
Key equipment includes a stand mixer or a mixing bowl, a rolling pin, donut cutters or a round cookie cutter, and a deep fryer or a heavy-bottomed pot for frying.
Different Types of Donuts
Donuts come in various shapes and sizes. Common shapes include:
- Ring Donuts: The classic circular shape with a hole in the center.
- Filled Donuts: These are filled with jam, custard, or other sweet fillings.
- Long John Donuts: Rectangular-shaped, usually filled or topped with glaze or icing.
- Twist Donuts: Twisted strips of dough often sprinkled with powdered sugar or cinnamon.
- Donut Holes: Small, bite-sized donuts created from the holes of ring donuts.
Now that you’ve got the basics down, let’s move on to the science of donut glazes in Chapter 2.
Chapter 2: The Science of Donut Glazes
Donut glazes are the secret behind a donut’s irresistible appeal. They not only add a touch of sweetness but also provide that mouthwatering glossy finish. Understanding the science behind these glazes is essential for mastering the art of donut making.
Why the Glaze is Crucial
A well-crafted glaze serves multiple purposes:
- Sweetness: It adds a sweet flavor that complements the sometimes plain or mildly sweet donut base.
- Texture: The glaze provides a contrasting texture to the soft donut, giving it a delightful crunch or smooth finish.
- Appearance: A glossy glaze makes the donut visually appealing, enticing the eyes before the first bite.
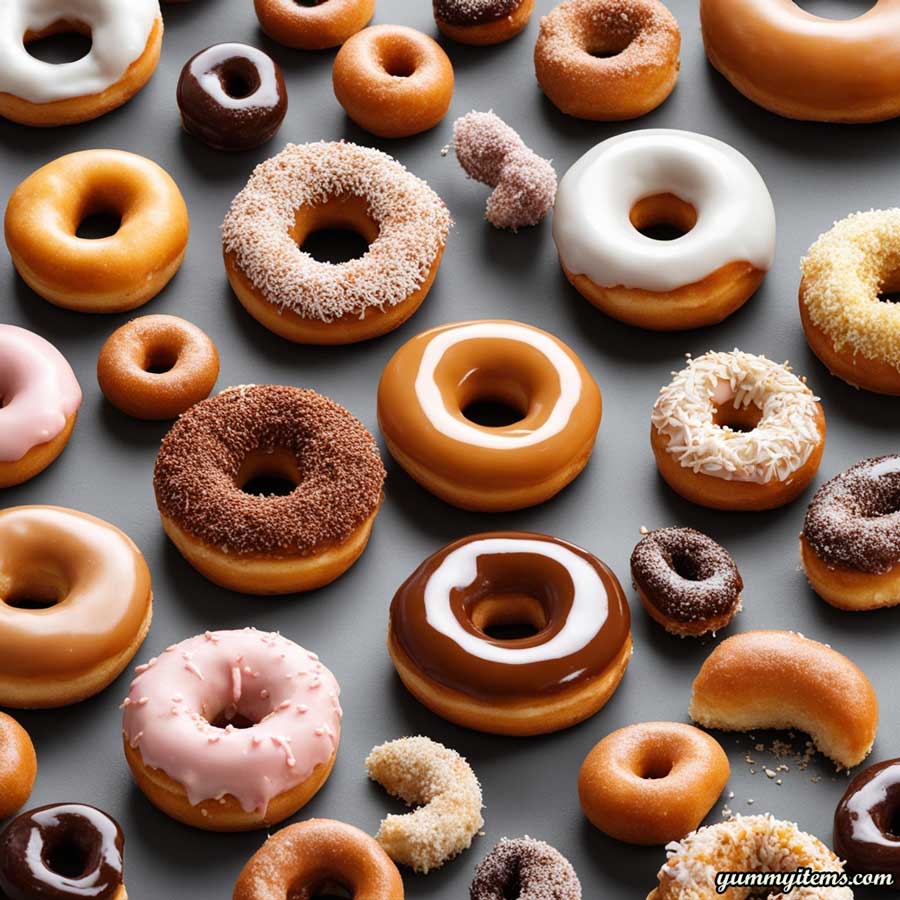
The Different Types of Donut Glazes
There are several types of glazes, each with its unique characteristics:
- Powdered Sugar Glaze: The most common and simplest glaze made with powdered sugar and liquid. It hardens upon drying.
- Chocolate Glaze: Made by melting chocolate and mixing it with sugar and cream. It offers a rich, indulgent flavor.
- Water-Based Glaze: This glaze is created using water, confectioners’ sugar, and flavorings. It tends to harden quickly and is ideal for a shiny finish.
- Alternative Sweeteners: For those seeking a healthier option, alternative sweeteners like honey or maple syrup can be used.
- Fruit Glazes: Made from fruit purees or juices, these glazes infuse the donuts with fruity flavors.
- White Icing: A smooth, white icing that can be used as a base for various decorations.
Factors That Affect Glaze Texture and Flavor
Several factors can influence the texture and flavor of your glaze:
- Sugar-to-Liquid Ratio: Adjusting the ratio of sugar to the liquid will determine the thickness of the glaze. More sugar leads to a thicker, sweeter glaze.
- Type of Sugar: Different sugars can be used, such as powdered sugar, granulated sugar, or brown sugar, each imparting a unique flavor.
- Liquid Choice: You can use milk, cream, water, fruit juice, or even coffee for different flavors.
- Flavorings: Extracts, spices, and zest can be added to enhance the taste of the glaze.
- Temperature: Glaze temperature affects its texture. A warmer glaze is thinner, while a cooler one is thicker.
- Consistency: Depending on your preference, the glaze can be smooth, glossy, or slightly textured.
With this foundation in place, let’s move on to a critical aspect of donut glazing in Chapter 3: “How to Get Donut Glaze to Harden.”
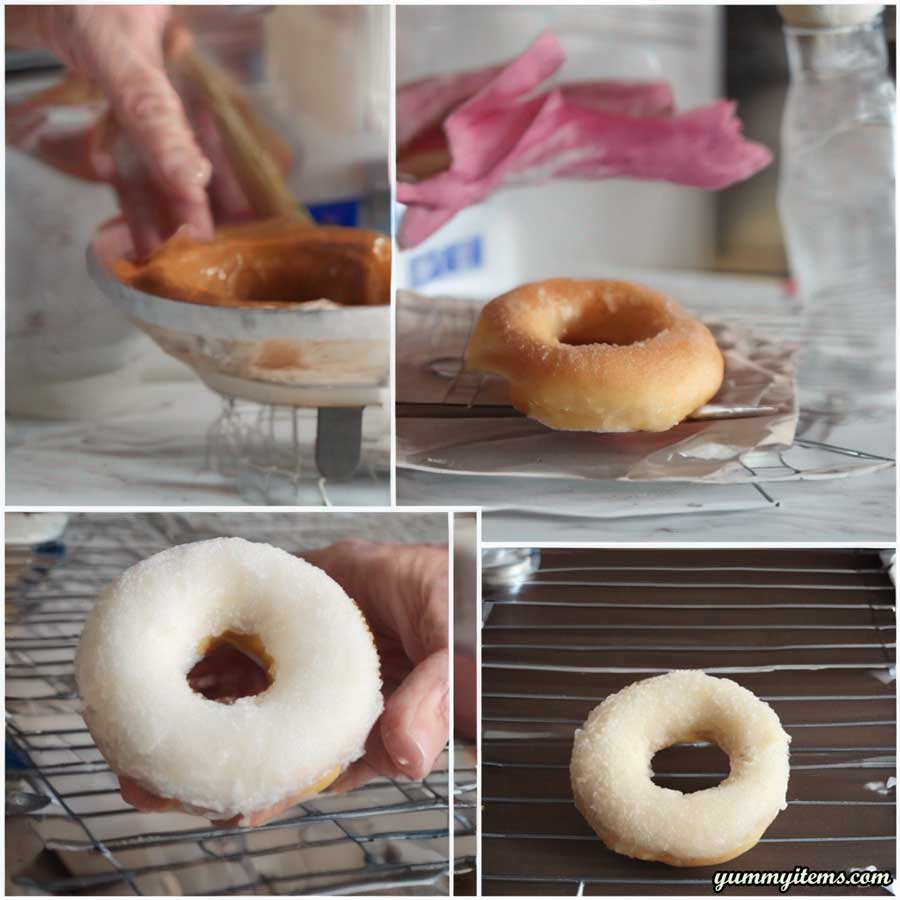
Chapter 3: How to Get Donut Glaze to Harden
Achieving a perfectly hardened glaze on your donuts is an art in itself. The glossy finish and satisfying crunch as you bite into the donut are what set a professional donut apart from the rest. In this chapter, we’ll share tips and techniques to help you get your glaze to harden flawlessly.
Key Tips for a Hardening Glaze
- Use the Right Ingredients: The primary ingredient for a hardening glaze is powdered sugar (confectioners’ sugar). This fine sugar dissolves easily and dries to a smooth, hard finish. Start with a base of powdered sugar in your glaze recipe.
- Liquid Control: Adjust the amount of liquid carefully. Add the liquid (usually milk or water) gradually until you reach the desired consistency. A thicker glaze will harden better.
- Temperature Matters: Keep the glaze at a moderate temperature while working with it. A warm glaze will be too runny, and a cold glaze will set too quickly. Room temperature is ideal.
- Dip and Drip: For even coverage, dip the donut into the glaze and allow excess to drip off. This ensures a thin, even layer that will harden beautifully.
- Double Dipping: If you want a thicker glaze layer, let the first coat dry before dipping again. This creates a multi-layered, more substantial glaze.
- Patience is Key: Allow the glazed donuts to sit undisturbed until the glaze hardens. This might take anywhere from 15 minutes to an hour, depending on the recipe and environmental conditions.
- Opt for Quick-Drying Glazes: Some recipes incorporate ingredients that speed up the hardening process, such as cornstarch or egg whites. These can be especially useful for intricate decorations.
- Top with Toppings: If you plan to add toppings like sprinkles, nuts, or edible glitter, do so before the glaze sets completely. This will help them adhere better.
Troubleshooting Common Issues
- Too Thick Glaze: If your glaze is too thick to spread evenly, add a little more liquid. Be cautious and add liquid slowly to avoid over-thinning.
- Too Thin Glaze: If your glaze is too runny, add more powdered sugar. You can also allow it to sit for a while to thicken naturally.
- Cracking Glaze: A glaze that cracks might be the result of overly thick or overly thin glaze. Finding the right balance is essential.
- Glaze Slides Off: If the glaze slides off the donut, the surface may not have been properly prepped. Ensure the donuts are clean and dry before glazing.
Now that you’ve mastered the art of achieving a perfectly hardened glaze, it’s time to explore different glaze types. In Chapter 4, we’ll cover “How to Make Glaze for Donuts with Powdered Sugar.”
Chapter 4: How to Make Glaze for Donuts with Powdered Sugar
Powdered sugar glaze is the classic, go-to choice for donut lovers. It’s easy to make, tastes sweet and smooth, and hardens beautifully to create that iconic donut finish. In this chapter, we’ll provide you with a step-by-step recipe for making a powdered sugar glaze.
Ingredients:
- 1 cup of powdered sugar
- 2 to 4 tablespoons of milk (adjust for desired consistency)
- 1 teaspoon of vanilla extract (optional)
- Food coloring (optional)
Instructions:
- Sift the Powdered Sugar: Sifting the powdered sugar ensures a smooth, lump-free glaze. Place the powdered sugar in a bowl and sift it using a fine-mesh strainer.
- Add Liquid Gradually: Begin by adding 2 tablespoons of milk to the sifted powdered sugar. Stir well to combine. Continue adding milk, one tablespoon at a time, until you reach your desired consistency. Thicker glaze requires less milk, while a thinner glaze needs more.
- Incorporate Flavor: If desired, add a teaspoon of vanilla extract to the glaze for a classic, sweet flavor. You can also experiment with other flavorings, like almond or lemon extract.
- Color Your Glaze: For a pop of color, add a few drops of food coloring to the glaze and mix until you achieve your desired shade.
- Dip or Drizzle: You can either dip your donuts into the glaze, ensuring they’re evenly coated, or drizzle the glaze over the top for a more artistic touch.
- Let it Set: Allow the glazed donuts to sit on a wire rack or parchment paper until the glaze hardens. This typically takes around 15-30 minutes.
Variations and Flavorings
The beauty of powdered sugar glaze lies in its simplicity and versatility. Here are some variations and flavorings to experiment with:
- Lemon Glaze: Add lemon zest and a squeeze of lemon juice for a zesty, citrusy twist.
- Maple Glaze: Replace the vanilla extract with maple syrup for a rich, autumnal flavor.
- Coffee Glaze: Dissolve instant coffee granules in the milk for a delightful coffee-flavored glaze.
- Colored Glazes: Customize the color to match the theme of your event, holiday, or personal preference.
- Sprinkle Toppings: Add colorful sprinkles, crushed nuts, or edible glitter while the glaze is still wet for a fun and decorative touch.
With your powdered sugar glaze perfected, it’s time to explore the world of chocolate glazes in Chapter 5.
Chapter 5: How to Make Chocolate Glaze for Donuts
Chocolate glaze is a favorite among donut enthusiasts. It adds richness, depth, and a heavenly cocoa flavor to your donuts. In this chapter, we’ll share a simple recipe for making a delectable chocolate glaze.
Ingredients:
- 1 cup of semi-sweet chocolate chips
- 2 tablespoons of butter
- 2 tablespoons of light corn syrup
- 1/4 cup of milk
- 1 teaspoon of vanilla extract
- Pinch of salt
Instructions:
- Melt Chocolate: Place the semi-sweet chocolate chips and butter in a microwave-safe bowl. Heat in 20-second intervals, stirring each time, until the mixture is smooth and completely melted.
- Add Corn Syrup and Milk: Stir in the light corn syrup, milk, and a pinch of salt until well combined.
- Incorporate Vanilla: Add the vanilla extract to the chocolate mixture and stir until smooth.
- Dip or Drizzle: Like with powdered sugar glaze, you can either dip the donuts into the chocolate glaze or drizzle it over the top.
- Allow to Set: Let the glazed donuts sit on a wire rack or parchment paper until the chocolate glaze hardens. This usually takes around 30 minutes.
Creating Variations Like Chocolate Ganache
For a more decadent and thick chocolate glaze, you can make a chocolate ganache. Here’s how:
Ingredients:
- 1 cup of heavy cream
- 8 ounces of semi-sweet chocolate, chopped
- 2 tablespoons of butter
- 1 teaspoon of vanilla extract
- Pinch of salt
Instructions:
- Heat the Cream: In a saucepan, heat the heavy cream until it’s about to simmer. Remove it from the heat.
- Add Chocolate and Butter: Pour the hot cream over the chopped chocolate and add the butter. Let it sit for a minute, then stir until the mixture is smooth and glossy.
- Incorporate Vanilla and Salt: Stir in the vanilla extract and a pinch of salt for added flavor.
- Dip the Donuts: Dip your donuts into the warm chocolate ganache. Be sure to shake off any excess.
- Let it Set: Allow the donuts to cool and let the ganache harden for about 30 minutes.
Now that you’re well-versed in creating tantalizing chocolate glazes, let’s explore the option of a water-based glaze in Chapter 6.
Chapter 6: Donut Glaze Recipe with Water
Water-based glazes are a fantastic option for those looking to avoid milk or dairy products. They can be equally delicious and achieve that glossy, hard finish. In this chapter, we’ll guide you through creating a water-based glaze for your donuts.
Ingredients:
- 1 1/2 cups of powdered sugar
- 3 to 4 tablespoons of water (adjust for desired consistency)
- 1/2 teaspoon of vanilla extract (optional)
- Food coloring (optional)
Instructions:
- Sift the Powdered Sugar: Sift the powdered sugar into a mixing bowl to remove any lumps.
- Add Water Gradually: Begin by adding 3 tablespoons of water to the powdered sugar. Stir well to combine. Continue adding water, one tablespoon at a time, until you achieve your preferred glaze consistency.
- Incorporate Vanilla: If you desire a sweet vanilla flavor, add 1/2 teaspoon of vanilla extract and mix well.
- Color Your Glaze: To add a pop of color, mix in a few drops of food coloring until you reach your desired shade.
- Dip or Drizzle: You can dip your donuts into the glaze for an even coating or drizzle the glaze over the top for a more decorative touch.
- Let it Set: Allow the glazed donuts to sit on a wire rack or parchment paper until the glaze hardens, which typically takes about 15-30 minutes.
Water-based glazes are a great option for vegans and those with lactose intolerance. They offer the same classic donut finish without the use of dairy products.
Chapter 7: How to Make Glaze for Donuts Without Powdered Sugar
What if you’re looking to avoid powdered sugar in your glaze? Perhaps you prefer a less sweet option or need a substitute due to dietary restrictions. In this chapter, we’ll explore how to make glaze for donuts without powdered sugar using alternative sweeteners and thickeners.
Ingredients:
- 1/2 cup of honey or maple syrup (or a combination of both)
- 1/4 cup of cornstarch
- 1/4 cup of water
- 1/2 teaspoon of vanilla extract (optional)
- Food coloring (optional)
Instructions:
- Mix Cornstarch and Water: In a saucepan, mix the cornstarch and water until the cornstarch is fully dissolved.
- Add Honey or Maple Syrup: Pour in the honey and/or maple syrup and stir well. Adjust the amount to your desired level of sweetness.
- Cook Over Low Heat: Place the saucepan over low heat and stir continuously until the mixture thickens. This usually takes a few minutes.
- Incorporate Vanilla: If you want to add a hint of flavor, stir in the vanilla extract.
- Color Your Glaze: If desired, add a few drops of food coloring to achieve your preferred hue.
- Dip or Drizzle: You can dip your donuts into the glaze for an even coating or drizzle the glaze over the top for a decorative touch.
- Let it Set: Allow the glazed donuts to sit on a wire rack or parchment paper until the glaze hardens, which usually takes about 15-30 minutes.
Alternative sweeteners like honey and maple syrup give your donuts a unique and complex flavor. The addition of cornstarch helps thicken the glaze to achieve the desired consistency.
Chapter 8: Donut Glazes and Toppings
The world of donut glazing is filled with endless possibilities. You can take your glazed donuts to the next level by exploring a variety of toppings and combinations. In this chapter, we’ll dive into the creative realm of donut glazes and toppings.
Glaze and Topping Combinations:
- Classic Glaze with Sprinkles: Dip your donuts in a traditional powdered sugar glaze and sprinkle colorful, edible sprinkles on top for a fun, festive look.
- Chocolate Ganache with Chopped Nuts: Create a rich chocolate ganache glaze and sprinkle finely chopped nuts like almonds or hazelnuts for a delightful crunch.
- Fruit Glaze with Fresh Fruit: Try a fruit glaze, such as raspberry or strawberry, and top your donuts with fresh fruit slices or berries.
- Lemon Zest and Sugar: Drizzle a lemon glaze over your donuts and sprinkle lemon zest and a dusting of sugar for a zesty, bright flavor.
- Caramel Drizzle with Sea Salt: Drizzle your donuts with a luscious caramel sauce and finish with a pinch of sea salt for a sweet-savory balance.
- White Icing with Edible Glitter: Ice your donuts with a pristine white icing and add a touch of edible glitter for a magical, enchanting effect.
- Mocha Glaze with Crushed Espresso Beans: Make a coffee-flavored glaze and garnish your donuts with crushed espresso beans for a caffeine kick.
- Maple Syrup Glaze with Bacon Bits: Glaze your donuts with a maple syrup-based glaze and sprinkle crumbled bacon bits on top for a sweet and savory treat.
These are just a few ideas to get you started on your journey to donut glaze creativity. Feel free to mix and match different glazes and toppings to discover your own signature donut creations.
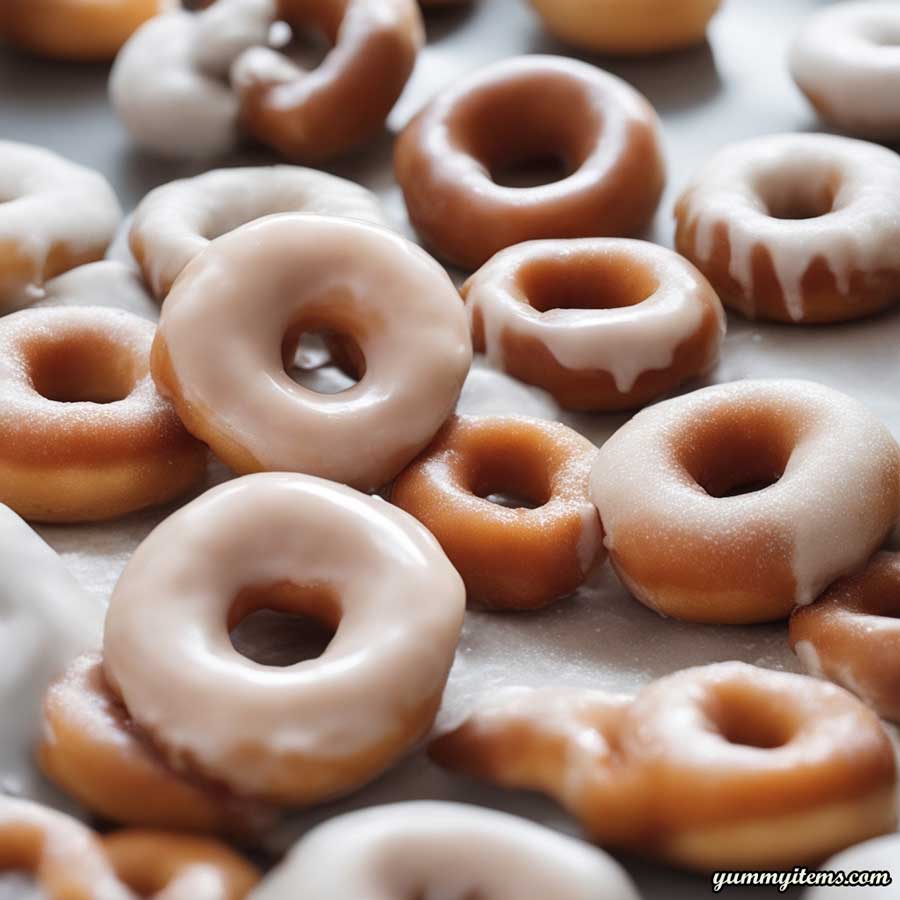
Chapter 9: White Donut Icing Recipe
White donut icing is a versatile and elegant option that serves as an excellent base for various decorations. In this chapter, we’ll explore how to make a smooth and pristine white icing for your donuts.
Ingredients:
- 2 cups of powdered sugar
- 2 to 3 tablespoons of milk
- 1/2 teaspoon of vanilla extract (optional)
- Food coloring (optional)
Instructions:
- Sift the Powdered Sugar: Sift the powdered sugar into a mixing bowl to remove any lumps.
- Add Milk Gradually: Begin by adding 2 tablespoons of milk to the powdered sugar. Stir well to combine. Continue adding milk, one tablespoon at a time, until you achieve the desired consistency.
- Incorporate Vanilla: If you want to add a hint of flavor, stir in the vanilla extract.
- Color Your Icing: For decorative purposes, mix in a few drops of food coloring until you achieve the desired hue. White icing can be transformed into any color to match your theme or design.
- Ice Your Donuts: Use a spatula or a butter knife to ice your donuts with the white icing. You can also create artistic patterns and designs.
- Let it Set: Allow the iced donuts to sit on a wire rack or parchment paper until the icing hardens, typically in about 15-30 minutes.
White donut icing provides a blank canvas for all your creative ideas. Whether you’re adding intricate decorations or keeping it simple, it’s a versatile choice for donut glazing.
Chapter 10: Donut Decoration and Presentation
Your donuts are a canvas for your creativity, and the way you present them can make all the difference. In this final chapter, we’ll explore tips for enhancing the visual appeal of your donuts and making them truly stand out.
- Color Schemes: Consider the color scheme of your glaze and toppings. Coordinating colors can create a visually appealing donut display.
- Uniformity: Aim for consistency in size and shape when making donuts. Uniformity makes the presentation more polished.
- Dip and Decorate: For donuts with toppings, dip them halfway into the glaze, allowing the toppings to stick to the glaze. This creates a professional look.
- Drizzling: A delicate drizzle of glaze or icing can add an artistic touch. Use a fork or a piping bag for precision.
- Edible Flowers: Edible flowers like pansies and violets can add a touch of natural beauty to your donuts. Ensure they are pesticide-free.
- Gold and Silver Accents: Edible gold and silver dust can turn your donuts into gourmet treats. Dust them lightly for a touch of elegance.
- Custom Design: Consider using stencils to create intricate patterns on your donuts. This is a fantastic way to personalize your donuts for special occasions.
- Packaging: Presentation extends to packaging. Use stylish boxes or bags to gift or serve your donuts. Consider adding a ribbon for a finishing touch.
- Themed Displays: Tailor your donut presentation to the occasion. Create thematic displays for holidays, birthdays, weddings, or other special events.
- Fresh Ingredients: Using fresh and high-quality ingredients for glazes and toppings can elevate the taste and appearance of your donuts.
Conclusion
Mastering the art of donut glazing is not only about creating delicious treats but also about making them visually stunning. Whether you’re perfecting the art of a hardening glaze, experimenting with chocolate glaze, or opting for alternative glaze options, you have the tools to create donuts that are as beautiful as they are delicious.
From traditional powdered sugar glazes to rich chocolate options and even dairy-free alternatives, you now have the knowledge and creativity to elevate your donut game. Don’t forget to explore different glaze and topping combinations, and remember that presentation is key.
So, gather your ingredients and let your imagination run wild. Whether you’re a donut enthusiast or an aspiring pastry chef, the world of donut glazing is yours to explore, savor, and share with others. Happy glazing!

