Ribs are a culinary delight loved by many, but who has the patience to wait hours for that slow-cooked perfection? In this comprehensive guide, we’ll explore the art of cooking ribs in the oven, and more importantly, how to do it quickly without sacrificing flavor. Whether you prefer using foil or going foil-free, you’re in for a treat. Let’s dive into the world of fast and fabulous oven-cooked ribs.
Table of Contents
- Understanding Ribs: Types and Cuts
- Prepping Ribs for the Oven
- Fast and Flavorful: Cooking Ribs in the Oven
- The Foil Debate: With or Without
- Fast Oven Ribs at 400°F
- The Fastest Way to Cook Ribs
- Timing is Everything: How Long to Cook Ribs in the Oven
- Plain and Simple: Cooking Ribs in the Oven
- Spare Ribs Unleashed: Oven Cooking
- Perfect at 350°F: How Long to Cook Ribs
Chapter 1: Understanding Ribs: Types and Cuts
Before we embark on our fast oven rib-cooking journey, it’s essential to understand the basics. We’ll explore the types and cuts of ribs available, helping you make the best choice for your culinary adventure.
Chapter 2: Prepping Ribs for the Oven
Proper preparation is the foundation for mouthwatering oven-cooked ribs. This chapter will guide you through the essential steps, from trimming and seasoning to marinating and resting the ribs.
Chapter 3: Fast and Flavorful: Cooking Ribs in the Oven
Get ready to uncover the secrets of quick, yet flavorful rib cooking. We’ll delve into essential techniques that deliver tender, juicy results, every time.
Chapter 4: The Foil Debate: With or Without
Should you use foil when cooking ribs in the oven, or go foil-free? We’ll explore both methods, highlighting the pros and cons of each, so you can choose what suits your preferences.
Chapter 5: Fast Oven Ribs at 400°F
If speed is of the essence, this chapter is for you. We’ll explore the process of cooking ribs at 400°F, ensuring you get your delicious meal on the table in no time.
Chapter 6: The Fastest Way to Cook Ribs
Looking for the absolute fastest method? We’ll unveil a technique that trims down cooking time even further, so you can satisfy your rib cravings in a hurry.
Chapter 7: Timing is Everything: How Long to Cook Ribs in the Oven
Precise timing is the key to perfect ribs. This chapter provides detailed guidelines for various rib types and cooking methods, ensuring your ribs are cooked to perfection.
Chapter 8: Plain and Simple: Cooking Ribs in the Oven
Sometimes, simplicity is the ultimate sophistication. Discover how to cook plain ribs in the oven, allowing the natural flavors of the meat to shine through.
Chapter 9: Spare Ribs Unleashed: Oven Cooking
Spare ribs have a unique charm of their own. We’ll explore how to cook spare ribs in the oven, highlighting the differences and similarities with other rib types.
Chapter 10: Perfect at 350°F: How Long to Cook Ribs
For those who prefer a slower approach, we’ll provide guidance on how long to cook ribs in the oven at 350°F. This method is perfect for those who want a balance between speed and flavor.
Now, let’s delve into each of these chapters to uncover the secrets to cooking ribs in the oven quickly while maintaining their mouthwatering flavor.
Chapter 1: Understanding Ribs: Types and Cuts
Before we can master the art of cooking ribs in the oven quickly, we need to understand the basics. Ribs come in various types and cuts, each offering its unique flavor and characteristics. The primary types of ribs are:
- Baby Back Ribs: These ribs are smaller and leaner, cut from the top of the ribcage. They’re known for their tenderness and mild flavor.
- Spare Ribs: Spare ribs are larger and meatier, cut from the lower part of the ribcage. They have a richer flavor and a bit more fat.
- St. Louis-Style Ribs: These are spare ribs with the brisket bone removed to create a more rectangular shape. They are well-marbled and packed with flavor.
- Beef Ribs: Beef ribs come from cattle and are larger, meatier, and more robust in flavor than pork ribs.
- Country-Style Ribs: These aren’t true ribs, but they’re a popular choice for their meatiness and versatility. They are cut from the blade end of the loin and contain both meat and a portion of the shoulder bone.
The choice of rib type and cut depends on your personal preference. Baby back ribs are ideal for those who prefer leaner, tender ribs, while spare ribs and St. Louis-style ribs are great for those who love rich, flavorful meat.
Chapter 2: Prepping Ribs for the Oven
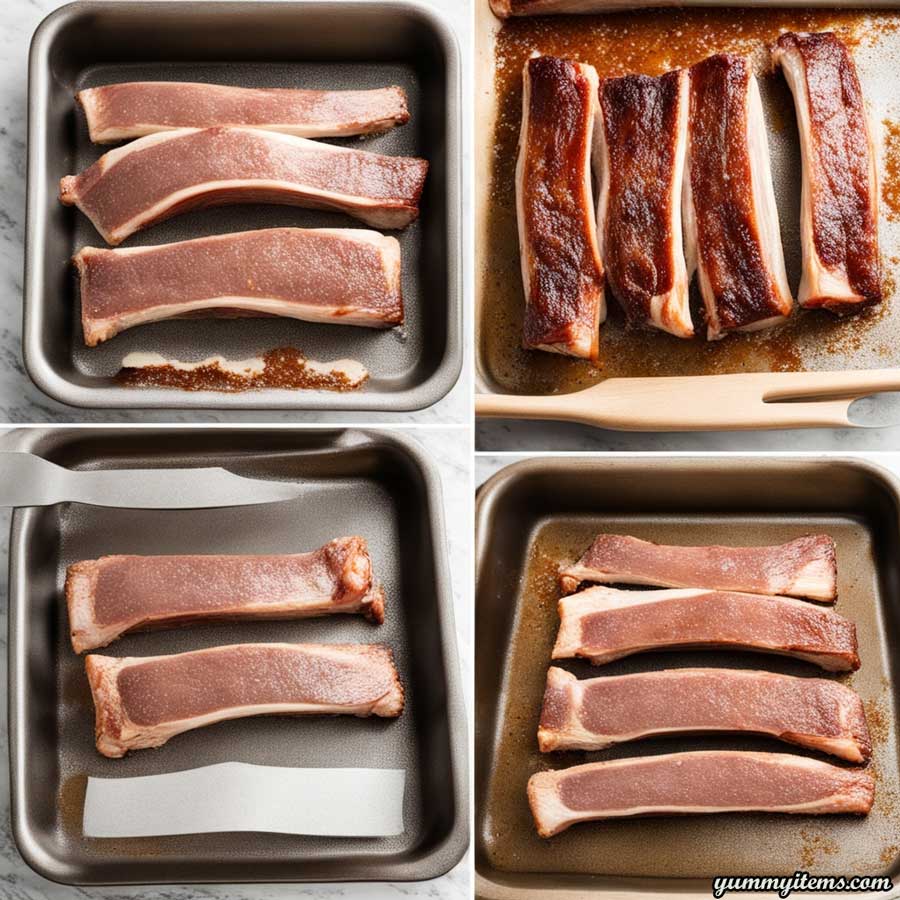
Proper preparation is crucial for achieving delectable, quick-cooked oven ribs. Here’s how to prep your ribs for the oven:
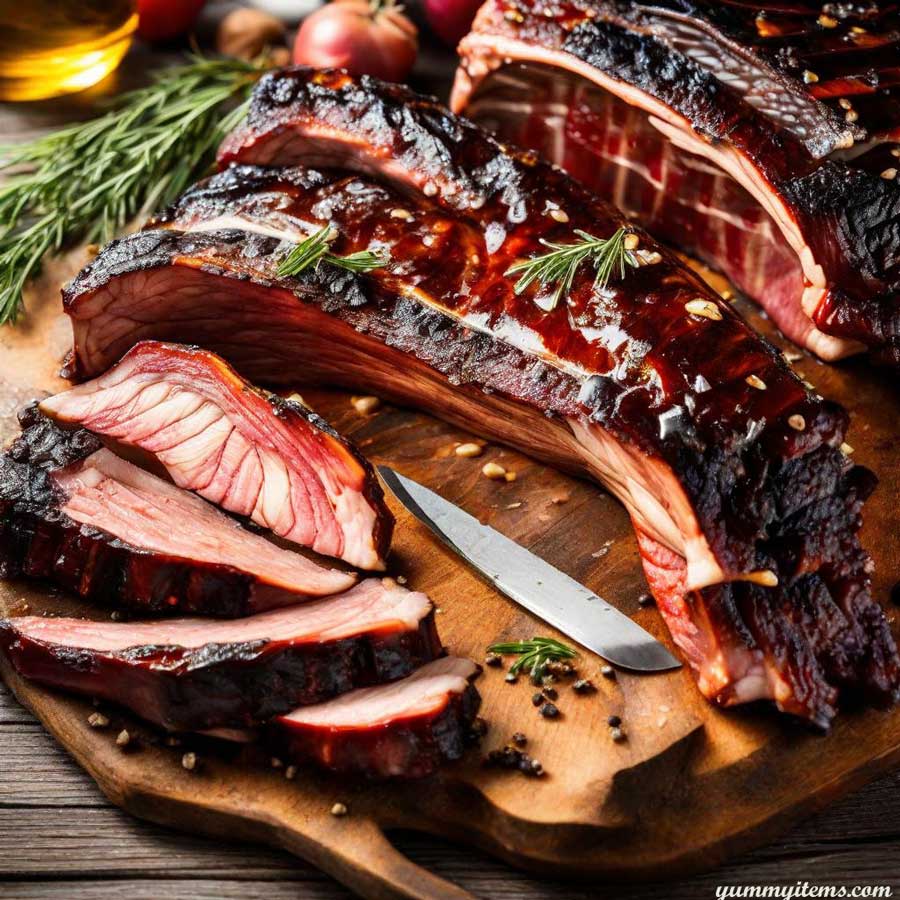
1. Trim Excess Fat: Trim any excessive fat from the ribs. While some fat is essential for flavor, too much can make your ribs greasy.
2. Remove the Membrane: On the bone side of the ribs, you’ll find a thin membrane. It’s essential to remove this membrane as it can become tough during cooking. Use a butter knife or a paper towel to help you grip it, then peel it off.
3. Season Generously: Season your ribs with a dry rub or marinade. A dry rub typically consists of a mixture of herbs, spices, salt, and sugar. Apply the rub generously on both sides, ensuring the meat is well-coated. For a more intense flavor, you can marinate the ribs for several hours or overnight in the refrigerator.
4. Let Them Rest: After seasoning, let the ribs rest at room temperature for about 30 minutes. This allows the seasonings to penetrate the meat, resulting in more flavorful ribs.
With your ribs expertly prepped, it’s time to explore the techniques for fast and flavorful oven cooking.
Chapter 3: Fast and Flavorful: Cooking Ribs in the Oven
While traditional rib recipes call for low and slow cooking, we’re all about speed without compromising on flavor. Here’s an overview of the key steps for fast and flavorful oven-cooked ribs:
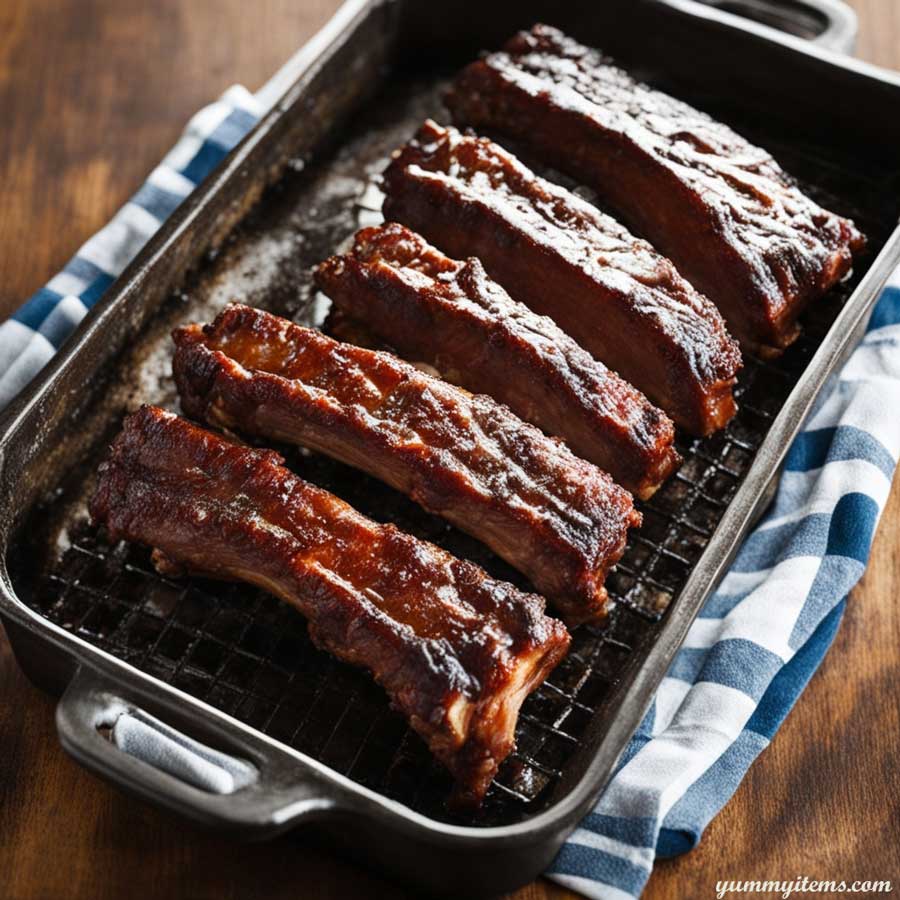
– Preheat Your Oven: Start by preheating your oven to the desired temperature, typically around 325°F to 400°F.
– Use the Right Pan: Choose a baking dish or tray that’s large enough to accommodate the ribs without crowding. You can line the pan with aluminum foil for easy cleanup.
– Foil or No Foil: The use of aluminum foil is a topic we’ll delve into more deeply in Chapter 4. It’s essential to decide whether you want to use foil or not based on your preferences.
– Bake Until Tender: The key to fast oven-cooked ribs is to bake them at a slightly higher temperature than traditional recipes. Bake the ribs until they are tender and the meat pulls away from the bone easily. This typically takes around 1.5 to 2 hours.
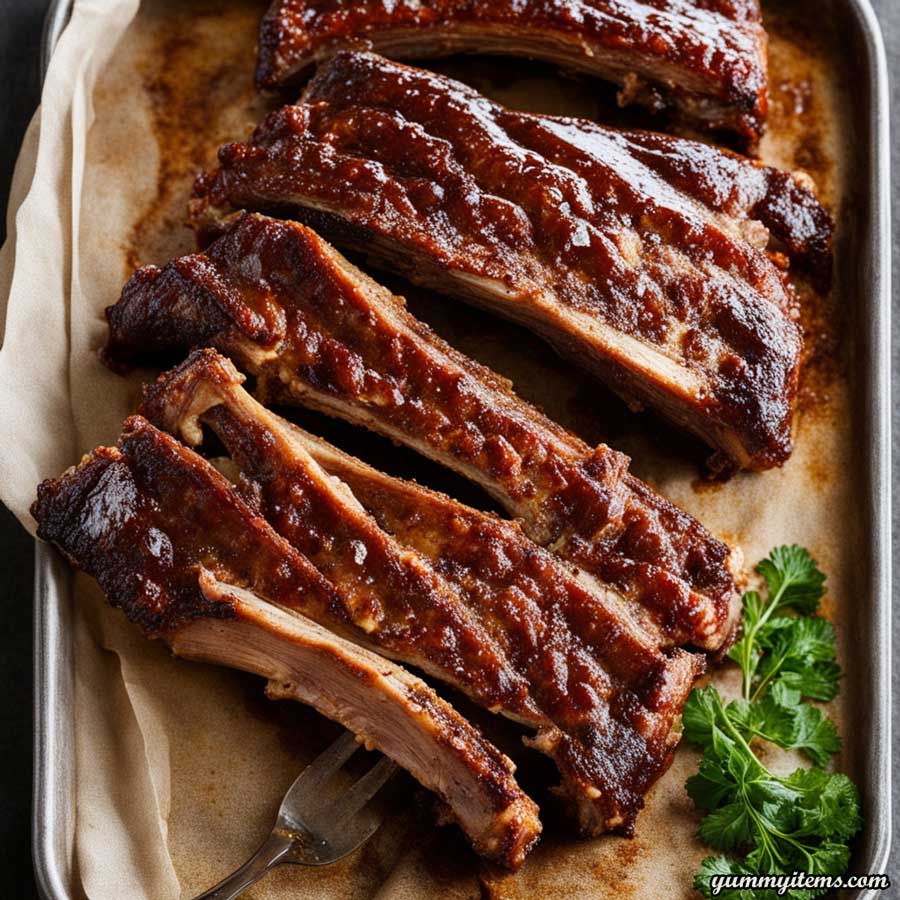
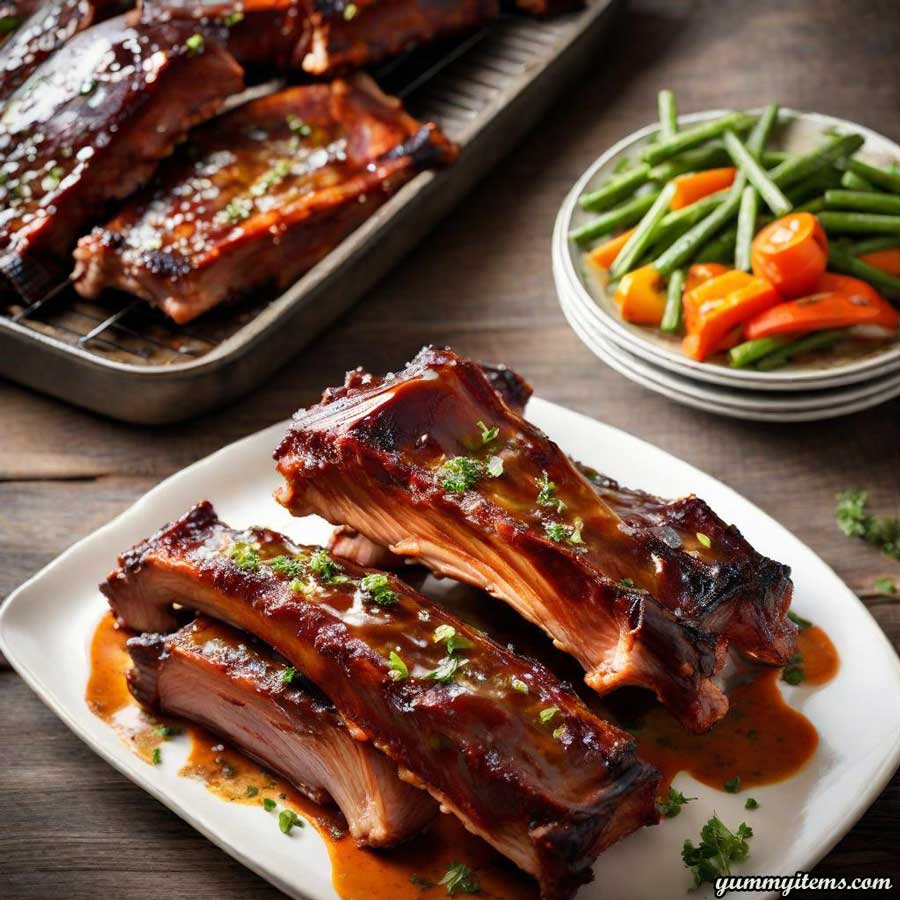
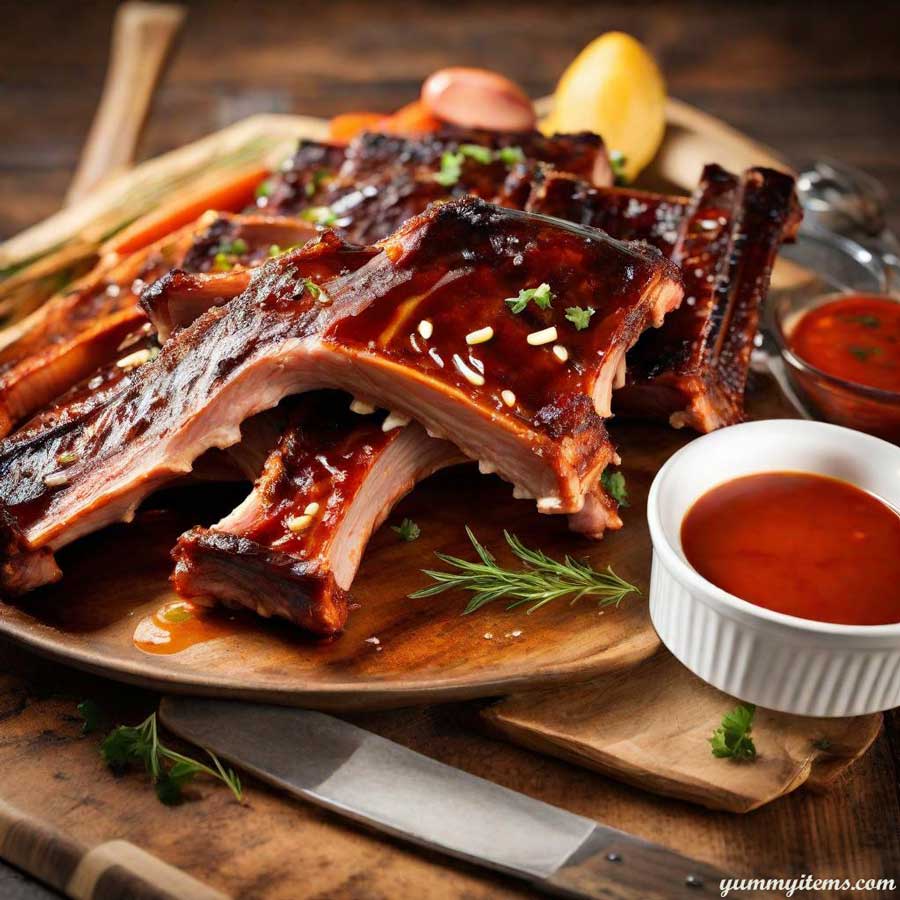
– Sauce or Glaze: If you enjoy saucy or glazed ribs, apply your preferred sauce or glaze during the last 20-30 minutes of cooking. Be sure to baste the ribs a couple of times for a flavorful finish.
– Rest and Serve: After cooking, let the ribs rest for a few minutes before slicing and serving. This allows the juices to redistribute within the meat, keeping it moist and flavorful.
Now that you have a general idea of how to cook fast and flavorful oven ribs, let’s explore the foil debate in Chapter 4.
Chapter 4: The Foil Debate: With or Without
Using aluminum foil when cooking ribs in the oven is a subject of debate among home cooks. The choice between using foil or going foil-free depends on your priorities and cooking preferences. Here’s a breakdown of the pros and cons of each method:
Cooking Ribs in the Oven with Foil:
Pros:
- Tenderizing: Foil can help tenderize the meat by trapping steam and heat.
- Easy Cleanup: Foil makes cleanup a breeze as it prevents drippings from sticking to the pan.
Cons:
- Less Bark: Ribs cooked with foil tend to have a softer bark or crust, which may not be as crispy as some prefer.
- Steamed Texture: The trapped steam can make the ribs slightly steamed in texture, as they’re essentially cooking in their juices.
Cooking Ribs in the Oven Without Foil:
Pros:
- Crispy Texture: Ribs cooked without foil tend to have a firmer bark, offering a satisfying crunch.
- Intense Flavor: The absence of foil allows the ribs to develop a more intense flavor as they cook in their own juices.
Cons:
- Harder Cleanup: Without foil, the pan can become covered in drippings and seasonings, which may require more effort to clean.
The choice between using foil or not comes down to your personal preference for texture and flavor, as well as your willingness to deal with cleanup. In Chapter 5, we’ll explore the fast oven rib-cooking method at 400°F.
Chapter 5: Fast Oven Ribs at 400°F
For those who crave quick results, cooking ribs in the oven at 400°F is an excellent choice. This higher temperature speeds up the cooking process while still delivering delicious results. Here’s a step-by-step guide:
1. Preheat Your Oven: Preheat your oven to 400°F (200°C). This high heat will help the ribs cook quickly.
2. Season the Ribs: Prepare your ribs as mentioned in Chapter 2, trimming, removing the membrane, and seasoning them with your preferred dry rub or marinade.
3. Use Foil or Not: Decide whether you want to use aluminum foil based on your preferences and the pros and cons we discussed in Chapter 4.
4. Bake the Ribs: Place the seasoned ribs in your baking dish or on a baking tray. If you’re using foil, wrap the ribs tightly. If you’re going foil-free, place them directly in the pan.
5. Check the Ribs: After about 1 hour of cooking, check the ribs for doneness. They should be tender and the meat should pull away from the bone easily. If they need more time, continue baking in 15-minute increments.
6. Apply Sauce or Glaze: If you prefer saucy or glazed ribs, apply your sauce or glaze during the last 20-30 minutes of cooking, basting a couple of times for extra flavor.
7. Rest and Serve: Allow the ribs to rest for a few minutes before slicing and serving. This resting period ensures that the juices redistribute within the meat, keeping it moist and flavorful.
Cooking ribs at 400°F is an excellent choice when you’re looking for speed without sacrificing flavor. However, if you’re seeking the absolute fastest way to cook ribs, let’s explore that in Chapter 6.
Chapter 6: The Fastest Way to Cook Ribs
Sometimes, speed is of the essence, and you need the fastest way to cook ribs without compromising too much on flavor. If you’re in a hurry, consider this technique:
1. Preheat Your Oven: Preheat your oven to its highest temperature setting. For most ovens, this will be around 500°F (260°C).
2. Season the Ribs: Prepare your ribs as usual, trimming, removing the membrane, and seasoning them with your preferred dry rub or marinade.
3. Use Foil or Not: Decide whether you want to use aluminum foil based on your preferences and the pros and cons we discussed in Chapter 4.
4. Bake the Ribs: Place the seasoned ribs in your baking dish or on a baking tray. If you’re using foil, wrap the ribs tightly. If you’re going foil-free, place them directly in the pan.
5. Cook Quickly: Bake the ribs in the preheated oven for about 20-30 minutes, keeping a close eye on them. This high heat will cook the ribs rapidly.
6. Apply Sauce or Glaze: If you prefer saucy or glazed ribs, apply your sauce or glaze during the last 10 minutes of cooking, basting a couple of times for extra flavor.
7. Rest and Serve: Allow the ribs to rest for a few minutes before slicing and serving. The brief resting period allows the juices to redistribute within the meat, keeping it moist and flavorful.
This high-heat method is the fastest way to cook ribs, but it may result in a slightly different texture compared to slower cooking methods. However, it’s an excellent choice when time is of the essence.
In Chapter 7, we’ll delve into the timing aspect of cooking ribs in the oven, providing guidelines for various rib types and cooking methods.
Chapter 7: Timing is Everything: How Long to Cook Ribs in the Oven
Precise timing is essential when cooking ribs in the oven, whether you’re cooking them fast or slow. The cooking time varies depending on the type of ribs, the cut, and the chosen temperature. Here are some general guidelines:
Baby Back Ribs:
- At 400°F (200°C): Cook for approximately 1.5 to 2 hours.
- At 500°F (260°C): Cook for about 45 minutes to 1 hour.
Spare Ribs:
- At 400°F (200°C): Cook for approximately 2 to 2.5 hours.
- At 500°F (260°C): Cook for about 1 to 1.5 hours.
St. Louis-Style Ribs:
- At 400°F (200°C): Cook for approximately 2 to 2.5 hours.
- At 500°F (260°C): Cook for about 1 to 1.5 hours.
Beef Ribs:
- At 400°F (200°C): Cook for approximately 2.5 to 3 hours.
- At 500°F (260°C): Cook for about 1.5 to 2 hours.
Country-Style Ribs:
- At 400°F (200°C): Cook for approximately 1.5 to 2 hours.
- At 500°F (260°C): Cook for about 45 minutes to 1 hour.
Keep in mind that these are general guidelines, and actual cooking times may vary based on factors such as your specific oven, the thickness of the ribs, and your preferred level of doneness. The best way to determine if your ribs are ready is to use the “bend test.” Grab a pair of tongs and lift the ribs. If they bend easily and the meat starts to crack but not fall apart, they are done.
In Chapter 8, we’ll explore a simple and elegant approach to cooking ribs in the oven, allowing the natural flavors of the meat to shine through.
Chapter 8: Plain and Simple: Cooking Ribs in the Oven
While saucy and flavored ribs are delightful, there’s an elegant simplicity in allowing the natural flavors of the meat to take center stage. Cooking plain ribs in the oven is straightforward and allows you to appreciate the meat’s inherent taste. Here’s a basic approach:
1. Preheat Your Oven: Preheat your oven to the desired temperature (around 325°F to 400°F, depending on your preference).
2. Season the Ribs (Optional): You can choose to season the ribs with a minimal dry rub or simply use salt and pepper to enhance the natural flavors of the meat.
3. Use Foil or Not (Optional): Decide whether you want to use aluminum foil, considering the pros and cons discussed in Chapter 4.
4. Bake the Ribs: Place the seasoned or unseasoned ribs in your baking dish or on a baking tray. If you’re using foil, wrap the ribs tightly. If you’re going foil-free, place them directly in the pan.
5. Check for Doneness: Use the “bend test” to determine if the ribs are ready. If they bend easily and the meat begins to crack but not fall apart, they are done.
6. Rest and Serve: Allow the ribs to rest for a few minutes before slicing and serving. This resting period allows the juices to redistribute within the meat, keeping it moist and flavorful.
Cooking plain ribs is a fantastic choice for those who appreciate the natural taste of the meat. It’s a simple and elegant approach that lets the quality of the ribs shine through. In Chapter 9, we’ll explore the world of spare ribs and how to cook them in the oven.
Chapter 9: Spare Ribs Unleashed: Oven Cooking
Spare ribs are a popular choice for their meaty, flavorful nature. If you have spare ribs on hand and want to know how to cook them in the oven, you’re in the right place. Here’s how:
1. Preheat Your Oven: Preheat your oven to the desired temperature (around 325°F to 400°F).
2. Season the Ribs: Prepare the spare ribs as mentioned in Chapter 2, trimming, removing the membrane, and seasoning them with your preferred dry rub or marinade.
3. Use Foil or Not (Optional): Decide whether you want to use aluminum foil, considering the pros and cons discussed in Chapter 4.
4. Bake the Ribs: Place the seasoned spare ribs in your baking dish or on a baking tray. If you’re using foil, wrap the ribs tightly. If you’re going foil-free, place them directly in the pan.
5. Check for Doneness: Use the “bend test” to determine if the spare ribs are ready. If they bend easily and the meat begins to crack but not fall apart, they are done.
6. Rest and Serve: Allow the ribs to rest for a few minutes before slicing and serving. This resting period allows the juices to redistribute within the meat, keeping it moist and flavorful.
Spare ribs are a meaty and flavorful choice, and cooking them in the oven is a fantastic way to enjoy their delicious taste. Finally, in Chapter 10, we’ll address cooking ribs at 350°F and provide guidelines on how long to cook them.
Chapter 10: Perfect at 350°F: How Long to Cook Ribs
For those who prefer a balance between speed and flavor, cooking ribs at 350°F is an excellent choice. This method ensures that the ribs cook thoroughly without rushing the process. Here’s how:
1. Preheat Your Oven: Preheat your oven to 350°F (175°C).
2. Season the Ribs: Prepare your ribs as mentioned in Chapter 2, trimming, removing the membrane, and seasoning them with your preferred dry rub or marinade.
3. Use Foil or Not (Optional): Decide whether you want to use aluminum foil, considering the pros and cons discussed in Chapter 4.
4. Bake the Ribs: Place the seasoned ribs in your baking dish or on a baking tray. If you’re using foil, wrap the ribs tightly. If you’re going foil-free, place them directly in the pan.
5. Check for Doneness: Use the “bend test” to determine if the ribs are ready. If they bend easily and the meat begins to crack but not fall apart, they are done.
6. Rest and Serve: Allow the ribs to rest for a few minutes before slicing and serving. This resting period allows the juices to redistribute within the meat, keeping it moist and flavorful.
Cooking ribs at 350°F strikes a balance between quick cooking and achieving that tender, flavorful result. This method is perfect for those who want to savor their ribs without too much haste.
Conclusion
In this comprehensive guide, we’ve explored the art of cooking ribs in the oven quickly and deliciously. Whether you prefer to use foil or not, cook at higher temperatures for speed, or take a balanced approach at 350°F, you now have the knowledge and techniques to prepare mouthwatering ribs that will satisfy your cravings. From understanding the types and cuts of ribs to mastering the “bend test” for doneness, you’re well-equipped to create delectable rib dishes.
So, fire up your oven, choose your favorite rib type and cooking method, and embark on a flavorful journey of fast oven-cooked ribs. Enjoy the rich, savory goodness of this classic dish, and savor every bite. Your taste buds will thank you for it. Happy cooking!

